
Wireguard and SOCKS for fun and profit
How often has this happened to you?
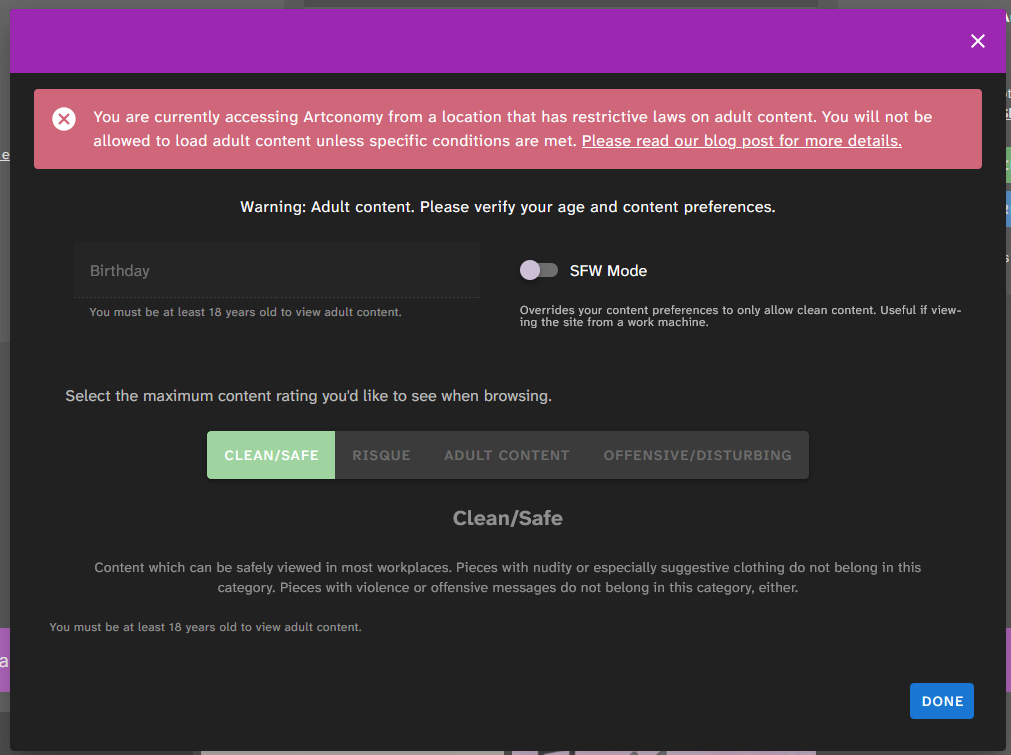
💬 Not a lot until recently.
🦦 I know right?! I wonder why that could be…
I assume most normal™ people just turn on their VPN and go about their day. For me that’s more irritating than not, since I usually don’t want to shove all of my traffic through a VPN tunnel; partly because it’s way slower than my internet, and also because the sheer number of sites hardblocking VPN endpoints seems to keep increasing.
So, with a little internet research, and far too much free time, I’ve come up with this workflow.
This works for me, using Firefox - I haven’t done any work with other browsers but it’ll probably work
First off, I found Wireproxy; a handy dandy little Go project that runs a WireGuard client and then exposes it as a SOCKS and HTTP(S) proxy. There’s not a whole lot of documentation on using it as a Docker container, but that didn’t really stop me. Turns out it’s really simple!
So here’s the Docker Compose spec, told you it was easy.
services:
  wireproxy:
    image: ghcr.io/whyvl/wireproxy:9dad356beeb3abad48434d5ec9272ad17af5b957
    volumes:
      - /opt/wireproxy/wireproxy.conf:/etc/wireproxy/config
    ports:
      - 1080:1080 #SOCKS5
If you try and just run that, it’ll break so you’ll also need a config file:
[Interface]
PrivateKey = XXXXXXXXX
Address = XXXXXXXXX
DNS = XXXXXXXXX

[Peer]
PublicKey = XXXXXXXXX
AllowedIPs = 0.0.0.0/0,::0/0
Endpoint = XXXXXXXXX

[Socks5]
BindAddress = 0.0.0.0:1080
Oh look at that, the top section is just a WireGuard config! Go ahead and swap that out for your config of choice, I just pulled a config from Mullvad and pasted that in. That little Socks5 section is where we’ll bind ports on our container, which is why we’re using 1080 in the compose (also it’s the standard SOCKS port).
Once that’s all filled out, docker compose up -d will get it running and that’s the proxy server side of things done, now on to making Firefox use it when we want to.
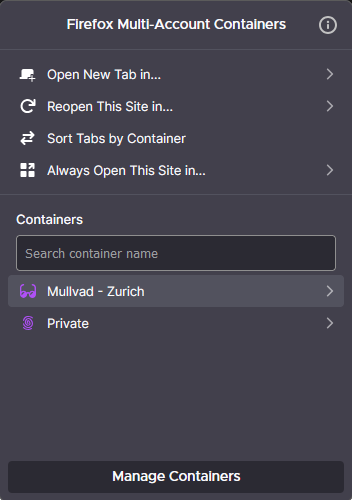
First you’ll need Firefox Multi-Account Containers, go through and set it up however you like. And then it’s a matter of doing a whole bunch of clicking to get to the settings.
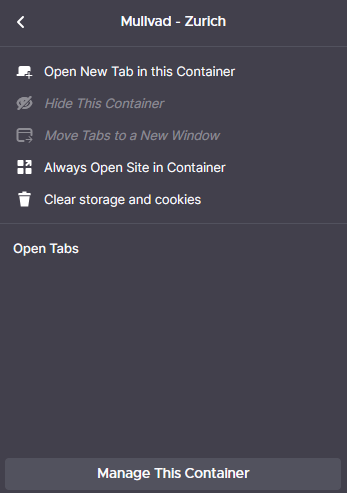
Open the settings by clicking the addon icon in your toolbar, from there click the little arrow next to the container you want to add a proxy to. Then click “Manage This Container” to pull up the actual settings.
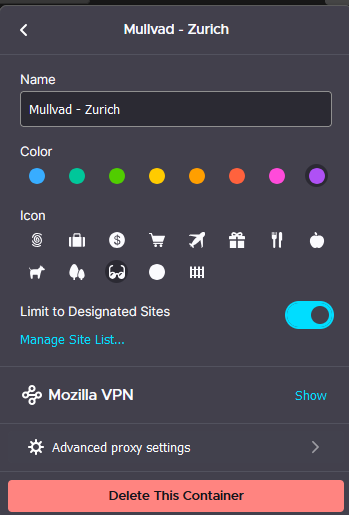
Right under that advert for Mozilla’s VPN, maybe don’t use that, click “Advanced proxy settings”
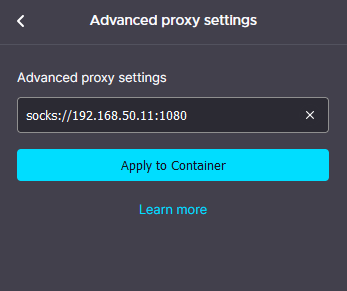
Voila! The useful bit of the plugin, drop in the IP address of your Docker host, and the port you mapped. Make sure you use socks:// and not socks5:// like I kept doing, the MAC addon seems to use SOCKS5 by default and doesn’t accept the correct URL schema.
With any luck, you’ll now have a container that switches to your VPN proxy automatically, letting you transparently access georestricted sites without needing to funnel everything out over the VPN.